Review first published in 2010
Kit Reviewed
| Scope under Review: | Vixen VC200L |
| Accessories Supplied (as standard) | Optical Tube Assembly Dovetail plate for GP, Sphinx, many EQ mounts 10×50 illuminated reticle viewfinder Flip Mirror |
| Extras Supplied | 73868 Focal Reducer for VC200L f/6.4 73523 Camera Adapter 43mm Deluxe 72954 DC Ring 60mm to T2-thread 73876 Canon EOS Focal Adaptor |
| Country of Manufacturer | Japan |
| Aperture / focal length / f | Aperture 200mm / focal length 1800mm / focal ratio f/9 |
| Limiting magnitude / resolution | Visual limiting magnitude 13.3 mag / theoretical resolution 0.63″ |
| Tube Weight | 6.3 kg. (13.2 lbs) |
| Tube Length/Diameter | 486mm / 232mm (9.1 x 24.4 in) |
First Impressions
Vixen describe this scope as a Vixen 6th-order Aspherical Catadiaoptric. So what does that mean? Its all to do with the configuration of the mirrors and lenses. Catadiaoptric means that the scope is a combination of mirrors and lenses. It allows the light to be folded in the tube, which means you can have a short tube with a long focal length. The mirror is aspherical, which means it is not perfectly rounded and needs some correction. Sounds complicated. Which normally means its expensive. Actually, this particular model is known in some circles as the poor mans Ritchey–Chrétien, and once I played for a bit, it was easy to see why.
The design is quite simple. A normal Schmidt-Cassegrain telescope (SCT) is setup with the primary mirror moving to focus and the corrector lens at the front of the telescope. The VISAC design attaches the primary mirror to the back of the telescope. Unlike a normal SCT, to achieve focus there is a single speed rack and pinion arrangement at the back. The primary mirror can 39;t move, so there is no mirror flop. The secondary mirror is held in place with a spider. The corrector is a series of lenses inside secondary tubes inside. This scope is its own dew shield!
Focusing is via a single speed rack and pinion focuser at the back. I was a little worried that there wouldn’t be enough in-focus at first, but this proved not to be the case. The scope focuses perfectly with my Canon 350D, Starlight Xpress SXV-H9 and SXVR-H18, and with a normal 2″ diagonal and eyepiece, so no problems there.
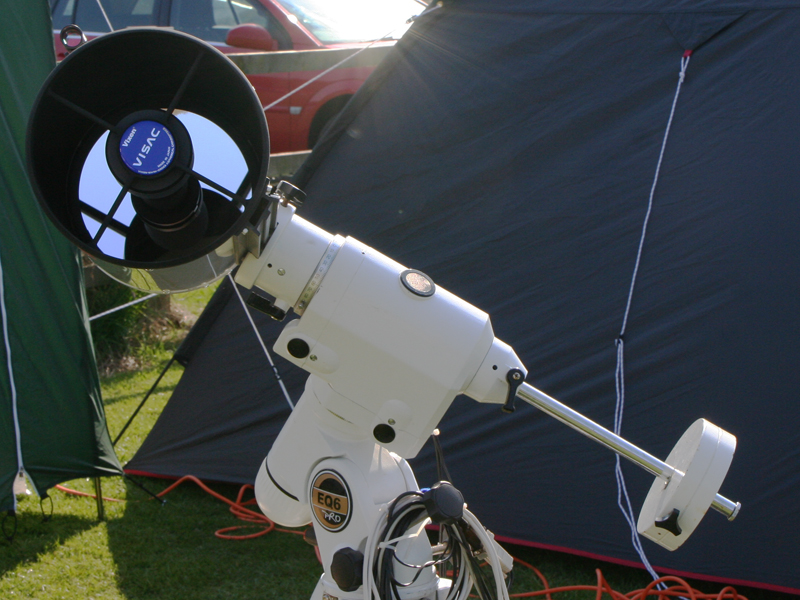
The scope is well built – I got just the OTA to review. There is a carry-handle at the top with a standard camera attachment screw, so mounting cameras for widefield use it a piece of cake. The unit also came with a pre-attached Vixen dovetail bar, so mounting it on Skywatcher or Vixen mounts is easy.
Collimation
When I recieved the scope, Vixen Opticron had already collimated the scope. My initial tests showed that the collimation is still perfectly set, even after delivery. Its also been in the back of my car to and from the Stargazers Lounge 5 Star Party and Salisbury Star Party, and hasn’t required any adjustments. Low Maintenance, perfect for Star Parties! I don’t think my eye is quite up to the Nick Howes or Damian Peach standard of collimation though!
Collimation is achieved by adjusting the primary mirror, instead of the usual SCT arrangement of adjusting the secondary. Some people have suffered problems with this setup, however, there are several good guides on the internet to help you out if you need it.
Initial Tests and a Planetary Encounter
First light was a good look at Mars and Saturn. Both resolved well in a 7.5mm eyepiece, and I was itching to get the camera onto the scope. Before that though, I had a good look at the moon with a 40mm Meade 5000. The view of the terminator was very nice and crisp. Turning the power up on the moon showed great detail. I must confess at this point, I couldn’t resist any longer and put the Skynyx onto the scope! My planetary imaging skills are not up to much though, so it wasn’t until later in the year when Jupiter put in an apperance that I managed to capture anything worth showing you. Here is Jupiter from 2010-08-09 – I still didn’t have a suitable IR/UV filter though at that point. It was taken using a Lumenera Skynyx 2-1C and a 2x Barlow.
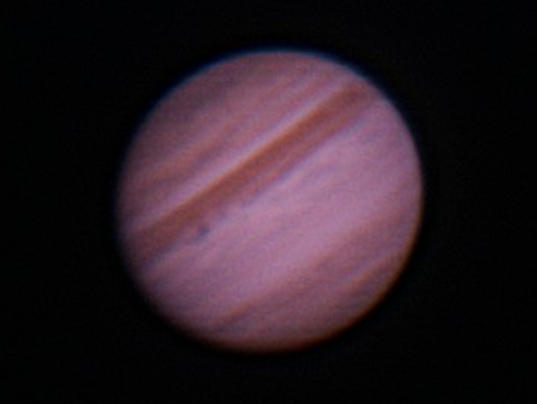
Jupiter
Imaging Deep Sky Objects
Vixen Opticron also supplied an F/7.1 Focal Reducer. This reducer screws onto the back of the focus tube. This brings the scope to the usual F/6.4 that we all know and love. Natively, this is an F/9 scope, not F/10 – 2000mm aperture and 1800mm focal length. It would be nice to get an F/5 reducer to bring the Field of View wider and give the scope a ‘faster’ Focal Ratio. The lower the number, the ‘faster’ the scope is, and the less time needed on targets.
I also have acquired a Starlight Xpress SXVR-H18 to replace my SXV-H9 Astronomical CCD camera recently, which worked extremely with the Vixen and the focal reducer. Reducing the effective focal length, focal ratio and field of view of the telescope when used with a camera.
Prime Focus
As usual for my imaging runs, the camera was placed at prime focus. I did have a google around for a suitable explanation, but it appears one isn’t readily available. So here goes for my attempt!
Any camera which can have its lens removed can be used with the Prime Focus method. You simply connect the camera to the telescope viewing end without any lenses in place – no eyepieces and no camera lens. Focusing is achieved in the normal way. Here is an example of a Prime Focus setup with my SXVR-H18, Truetech Filter Wheel and various connectors. The Focal Reducer is also used in this case.
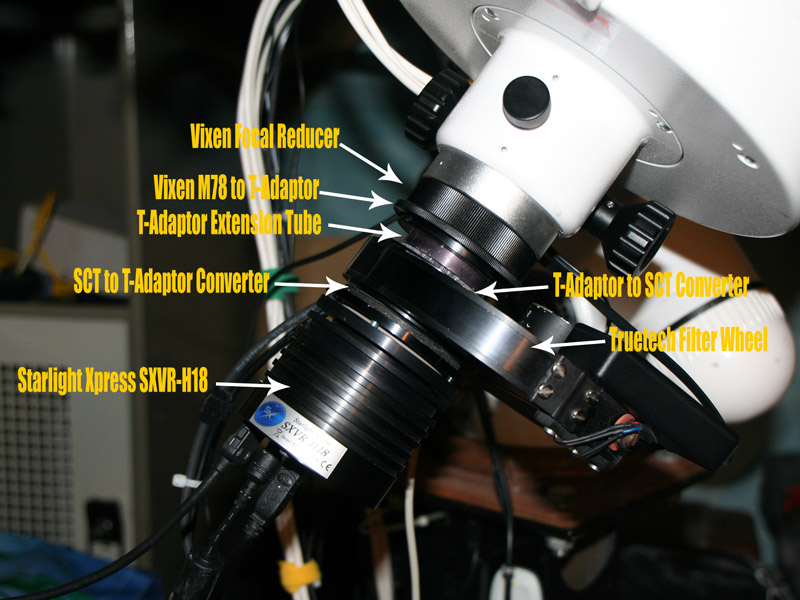
SXVR-H18 attached to the Vixen VC200L
First Deep Sky Image
I decided to return to an old friend. I have never been satisfied with the images I achieved of the Crescent Nebula (NGC6888.) To be honest, I still am not, but that is the fault of my processing and not the SXVR-H18 or VC200L. I have recently gone through my raw data again, and I think I can put a much better version together. However, that is having to wait at the moment.
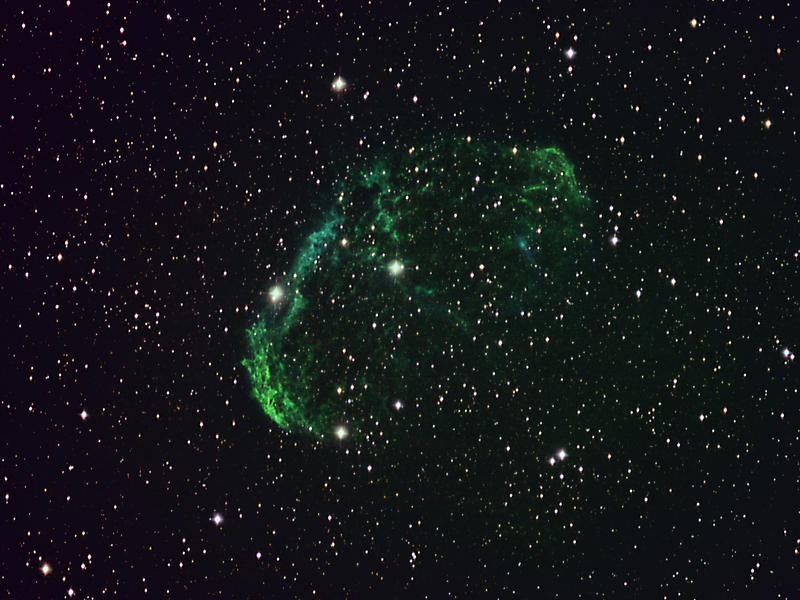
Crescent Nebula in Sii/Ha/Oiii
That being said, look at the field of view! The view is approximately the same as with the SXVR-H18 on my old 102mm F/7 Astro-Professional scope. The Vixen is also giving extremely sharp and crisp detail for the H18 to work on. I love the way the diffraction spikes work with the Narrowband as well. These are caused by the 4-vane spider in the front of the scope.
4 Vane Spider
To be honest, that is the only critiscism I have of this scope. The spider vanes are very wide, and therefore cause quite ‘blocky’ diffraction spikes. However, I do happen to like diffraction spikes in my images, and the Vixen certainly delivers on that front.
Conclusion
If you want to ask whether I would recommend this scope, the answer is yes. In fact, I brought it after the review. The very few dis-advantages are outweighed by the superb benefits in my view.